Knapsack without repetition

Similarly to the previous problem, we have a knapsack with a specified capacity, a number of items with different weight and value, and we want to select a subset of them that would fit in the knapsack maximizing its value. The difference is that now we are not allowed to put in the knapsack copies of the same item. For this reason this problem is also known as 0/1 knapsack.

If we keep a dynamic programming approach, the solution won't be too different to the previous one, however we'll need to store the results for all subproblems in a bidimensional array and the process of generating a new subsolution is going to be a bit more complex.

The idea is that we have a row for each family of subproblems having up to the actual number of items we can choose from.

Zeroth row is there just to simplify the algorithm, being quite obvious that a knapsack containing zero or one element chosen from no item is going to always have a weight of zero.

First row is only marginally more interesting. We check the first item, as soon as its weight matches the capacity of a (sub)knapsack, we assign its value to that subsolution, an then al the other subsolutions on its right would have the same value, since we have no other items available.

It is from second row that we have a more clear view on the problem complexity, since for a generic position in it we have to ensure the capacity of the current knapsack in the subproblem would be optimally filled by the available items.

Let's see a test case to help us to figure out how to work it out.
public void testWithouRepetition() {
 int[] weights = new int[] { 2, 3, 4, 6 };
 int[] values = new int[] { 9, 14, 16, 30 };

 assertThat(Knapsack.withoutRepetition(values, weights, 10), is(46));
}
The table with all the subsolutions for our problem would be:
[ 0,  0,  0,  0,  0,  0,  0,  0,  0,  0,  0]
[ 0,  0,  9,  9,  9,  9,  9,  9,  9,  9,  9]
[ 0,  0,  9, 14, 14, 23, 23, 23, 23, 23, 23]
[ 0,  0,  9, 14, 16, 23, 25, 30, 30, 39, 39]
[ 0,  0,  9, 14, 16, 23, 30, 30, 39, 44, 46]
Notice that, zeroth column is an all-zero because whichever is the number of items available, having zero as capacity of the current sub-knapsack will lead to a no-item-selected solution. First column is again filled with zeroes, but for a different reason, there is no item with a weight 1.
In the first row we use only the first item available, the one with weight 2 and value 9. From the second cell on, we can put its value in it.
In the second row, we can put only {2, 9} in cell (2, 2). Next to the right, (2, 3), we could put {2, 9} or {3, 14}. The latter wins. Since (2, 5) on, we can put both items, so the value stored in these cells is 23.
And so on.

Here is how I have modified the algorithm seen in the previous post to adapt it to this slightly different problem:
public static int withoutRepetition(int[] values, int[] weights, int weight) {
   assert (values.length == weights.length); // 1

   int[][] results = new int[values.length + 1][weight + 1]; // 2
   for(int i = 1; i < results.length; ++i) { // 3
      for(int j = 1; j < results[i].length; ++j) { // 4
         results[i][j] = results[i - 1][j]; // 5
         if(weights[i - 1] > j) // 6
            continue;
         int candidate = results[i - 1][j - weights[i - 1]] + values[i - 1]; // 7
         if(candidate > results[i][j])
            results[i][j] = candidate;
      }
   }

   return results[values.length][weight];
}
1. A minimal checking to ensure no funny stuff in input. For each value should be available the correlated weight.
2. Core of the dynamic programming algorithm. A table that is going to contain all the subsolutions is created. The following double for loop will fill it up and in the bottom right cell we'll find the solution.
3. Row 0 is not affected, since we know that it has to contain just a bunch of zeroes.
4. Column 0, for each row, is not affected since, again, we just want a zero in it.
5. The current element is initialized with the value contained in the cell in row above, same column.
6. If the weight of the item associated with the current row is bigger than the capacity for the current subsolution, there is not much to do, just skip to the next iteration.
7. Otherwise, let's check if considering the new element in the knapsack will bring to a better solution. We make room for it in the knapsack, considering the best solution in the row above that has enough room for it, and add its value.

On GitHub you will see that my Java class Knapsack now has also the method to calculate the "without repetition" variation of the problem. And a test case for it has been added to the associated JUnit class.

Go to the full post

Knapsack with repetitions

We are given a set of items, each of them having a weight and a value, and a knapsack with a specified capacity. Each item is available in as many elements as we like. We want to fill the knapsack in a way that it contains the higher possible value.

A JUnit test case should help to clarify the problem:
public void testWithRepetition() {
   int[] weights = new int[] { 2, 3, 4, 6 };
   int[] values = new int[] { 9, 14, 16, 30 };

   assertThat(Knapsack.withRepetition(values, weights, 10), is(48));
}
We have for different items. The lighter one has weight 2 and value 9, the heavier 6 and 30. We want to write a static method withRepetition() in the class Knapsack that, given in input values, weight and knapsack capacity (here is 10) it would give back the maximum value storable in that knapsack.

In our case the expected result is 48, coming from weights 6 + 2 + 2, being the value of this triad 30 + 9 + 9.

Here is my Dynamic Programming solution, based on the algorithm discussed in chapter 6 of the excellent book Algorithms by S. Dasgupta, C.H. Papadimitriou, and U.V. Vazirani, using Java as implementation language:
public static int withRepetition(int[] values, int[] weights, int weight) {
   assert(values.length == weights.length);

   int[] results = new int[weight + 1]; // 1
   for(int i = 1; i < results.length; ++i) { // 2
      for(int j = 0; j < weights.length; ++j) { // 3
         if(weights[j] > i) // 4
            continue;
         int candidate = results[i - weights[j]] + values[j]; // 5
         if(candidate > results[i])
            results[i] = candidate;
      }
   }
   return results[results.length - 1]; // 6
}
1. Here I am going to store all the results of the subproblems and, in the last element, the one to the actual problem. Notice that we need an element also for the trivial case, knapsack of size zero, that has the obvious solution of zero.
2. Looping on all the DP subproblems, from the first one, where the capacity is one, to calculate at last the actual problem.
3. For each subproblem I verify which is among all the items available the one that maximize the result.
4. If the current item has a weight bigger than the knapsack capacity, there is nothing to do.
5. Check what happens using the previous solution that allows to use the current item, storing the candidate result in a temporary variable. If it is a better result, store it in the array of subresults.
6. In the last element of the array we have the required value.

The only test case that I tried, is the one provided by the book that you have already seen above. Anyway, you could find it on GitHub, side by side the source Java code for the class Knapsack.

Go to the full post

Levenshtein distance

Given two strings, return its Levenshtein distance, i.e. the minimum number of character changes needed to mutate the first string in the second one.

You can have a look at this Levenshtein demo to get a better idea of what is expected. Notice that the demo is more complicated than the required solution. We are interested only in the "plain" string type, and we always use weight 1 for indel (insertion/deletion) and substitution operations. Moreover, we don't consider swap.

The Levenshtein distance is often used to show how Dynamic Programming works in a more complicated case than the classic make change problem. Here I present my Java solution based on the Wagner–Fischer algorithm, that asks us to build a bidimensional table generating its values starting from the most basic cases up to the required solution.

The idea of the algorithm is to put on one table axis the first string and the second one on the other one, paying attention to give an extra position at the beginning of both string. So, for instance, if we want to calculate the distance between "one" and "bone", we'll 4 rows and 5 columns (or the other way round).

Then we have to populate the tables. The top-left cell is the easiest one, it represent the case I want to pass from an empty string to another empty one. No change is needed, so I put there a zero.

To understand what I should put in the first row I can think to the case I want to calculate the distance from an empty string to another one size n. Obviously, I would increase by one the value in each cell, representing the cost of inserting a new character.

Similarly, the first column will follow the same structure. Here the increment would represent the deletion of a character.

The generic case is a bit more complicated, since we have to evaluate four different cases. Let's think to the cell (1,1). To decide which value assign to it we need to compare the first elements of both string. If it is the same, we don't have to increase the distance, we just keep the value calculate for the top left case, namely cell (0,0). Otherwise, we need to consider all the three possible editing that would let us arrive there, inserting a new character, deleting or substituting the existing one. Since we want to find the minimum distance, we'll choose the smallest among these values.

Remembering how we filled the first row and column, we should see how to get the value for inserting and deleting, it is just a matter of increasing the value contained on the cell on the left and on the top, respectively. For substitution we have to refer to the top-left cell, as we have done for the equality case.

Once we have grasped the sense of it, building the table is a piece of cake, and what we have to do is just returning the value in the bottom-right cell.

For testing purpose, and for let me better understand how things work, instead of implementing the solution with a single static method, I used a class with a constructor, that does all the dirty job, and a couple of public methods, one that returns the calculated Levenshtein distance and another one that checks the table as generated by the constructor. You could see the full Java code on GitHub, both for the Levenshtein class and its associated test cases, here I publish and comment only the ctor:
private int[][] matrix; // 1

public Levenshtein(String from, String to) { // 2
    matrix = new int[from.length() + 1][to.length() + 1]; // 3
    for (int i = 1; i < matrix[0].length; ++i) { // 4
        matrix[0][i] = i;
    }
    for (int j = 1; j < matrix.length; ++j) {
        matrix[j][0] = j;
    }

    for (int i = 0; i < from.length(); i++) { // 5
        for (int j = 0; j < to.length(); j++) {
            if (from.charAt(i) == to.charAt(j)) { // 6
                matrix[i + 1][j + 1] = matrix[i][j];
            } else { // 7
                int insert = matrix[i][j + 1] + 1;
                int delete = matrix[i + 1][j] + 1;
                int substitute = matrix[i][j] + 1;
                matrix[i + 1][j + 1] = Math.min(Math.min(insert, delete), substitute);
            }
        }
    }
}
1. Here is where I am going to store all the partial solutions and the actual one.
2. I think the first string associated to the rows in matrix, the second one to the columns.
3. The matrix has one row plus one for each character in the first string and a column plus one for each character in the second one.
4. Initialize the zeroth row and column as discussed above. No need to initialize matrix[0][0], the default value 0 is exactly what we want.
5. Loop on all the characters in both strings.
6. It's a match! Put in the relative cell in the matrix the same value stored in the top left cell.
7. Otherwise calculate how much is going to cost to put there the right value by insertion, deletion, substitution, and put there the minimum value among these three ones.

Once built the matrix, the solution appears on the bottom right cell in the matrix.

Go to the full post

Minimum number of coins to make change

We should give a certain amount back, and we want minimize the number of coins involved in the operation, accordingly to the available denominations. So, for instance, we have only copper Euro cents (1, 2, 5) and the change should be 4. In this case the expect result is 2, a couple of 2c coins.

We could think to use a greedy procedure, and sometimes it works beautifully, as in example I showed above. However it does not work for all possible denominations. As a counterexample think what happens if we have to generate 40 from (1, 5, 10, 20, 25). The greedy solution is 3, 25c + 10c + 5c, while the optimal solution is 2, 20c + 20c.

Actually, this problem is commonly used to introduce dynamic programming, where the idea is solving all the subproblems originating from the required one, starting from the simplest ones, and using those partial solutions to build up the more complex ones.

Here is a possible Java solution:
public static int minNumCoins(int amount, List<Integer> coins) {
 assert (amount >= 0); // 1
 assert (isConsistent(coins)); // 2

 List<Integer> results = new ArrayList<>(amount + 1); // 3
 results.add(0); // 4
 for(int i = 1; i <= amount; ++i) { // 5
  results.add(Integer.MAX_VALUE); // 6
  for(int coin : coins) { // 7
   if(coin > i)
    break;

   int tentative = results.get(i - coin) + 1; // 8
   if(tentative < results.get(i)) {
    results.set(i, tentative);
   }
  }
 }

 return results.get(results.size() - 1); // 9
}
1. I assert that the required amount should be not negative.
2. I have delegate to an helper method the consistency check on the coin list. I assume the requisite are that it should not be empty, it has to start from 1, and to be sorted.
3. I'm going to store in this array-list the results for the subproblems and the problem itself. When a step would required a previously calculated subsolution, it would get the result from this list. This technique is known as memoization.
4. Base case. An amount of zero requires no coin.
5. Let's calculate all the subproblems before generating the result for the actual one.
6. Initialize the current solution to the worst possible value.
7. Check it against all available coins, assuming the list being sorted, see (2), we can stop looping as soon as we see a coin greater than the index of current element in the list.
8. A tentative solution is the number of tentatives for the previous intermediate step plus one. If this try is better than the current tentative solution, let's use it as candidate.
9. Now we just have to return the last item in the result array-list.

Full Java code is on github. There you will find, beside the code you have already seen above, in the same class CoinChanger also a greedy implementation, that is going to fail in some cases. Also a JUnit suite of test cases is there.

Go to the full post

Greatest Common Divisor

Given two integers, find their greatest common divisor.

If you don't know the Euclid algorithm, you should get to a piece of code like this:
static public int naive(int a, int b) {
    int result = 1;
    for (int i = 2; i <= Math.min(a, b); ++i) {
        if (a % i == 0 && b % i == 0) {
            result = i;
        }
    }
    return result;
}
This raw idea could be improved considering that it doesn't make any sense to check numbers bigger than the square root of the smaller one (beside itself), as well as the multiple of the already discarded numbers - if 2 is not a good candidate, there is no use in checking any even number.

However, Euclid devised such an elegant and fast converging algorithm that you should have a really good reason to explore alternatives.

Knowing that the gcd of a and b is the same as the gcd of a and a % b, we can write:
public static int euclid(int a, int b) {
    while (b != 0) {
        int temp = b;
        b = a % b;
        a = temp;
    }
    return a;
}

To ensure I didn't make any silly mistake when writing my Java code, I have written a couple of simple JUnit test cases. Both files are now on GitHub.

Go to the full post

Last digit of a Fibonacci number

The Fibonacci sequence leads rapidly to such huge values that it gets difficult even to think to a monster like Fibonacci of one million. However, let's say that we have a less mind-boggling problem, calculating just the last digit of it, even if for large input, like one hundred million. This is not a big issue, in the worst case it is to spot a linear time complexity solution, and if we check closely the properties of the sequence, we could devise a costant time one.

Firstly, I write a few test case. I am using JUnit 4, and the assertThat Hamcrest-style assertion:
public class FibonacciTest {
    static final Fibonacci fib = new Fibonacci();

    // ...

    @Test
    public void testLastDigit40() {
        assertThat(fib.lastDigitNaive(40), is(5));
    }

    @Test
    public void testLastDigit327305() {
        assertThat(fib.lastDigit(327_305), is(5));
    }

    @Test
    public void testLastDigit100mio() {
        assertThat(fib.lastDigit(100_000_000), is(5));
    }
It is reasonably easy to calculate Fibonacci(40) = 102_334_155 and, trust me, both Fibonacci(327_305) and Fibonacci(100_000_000) have also a five as their last digit.

Then I write a first implementation for lastDigit() method in my class Fibonacci:
public int lastDigit(int n) {
    if (n < 2) // 1
        return n;

    int previous = 0; // 2
    int current = 1;

    for (int i = 1; i < n; ++i) { // 3
        int older = previous;
        previous = current;
        current = (older + previous) % 10; // 4
    }

    return current;
}
1. Accordingly to the modern definition of this sequence, Fibonacci(0) is 0 and Fibonacci(1) is 1.
2. To calculate the current Fibonacci number we need to keep track of the latest two ones.
3. Let's loop until we reach our target. The previous value will be discarded, current one will become previous, and the current one is calculated.
4. We are lucky, we don't need to store the actual Fibonacci number, it's last digit is enough.

Not a bad solution, however we could do better. We just have to notice that after 60 numbers, the final number in the sequence enter in a loop and repeat the first value. The is an interesting thread on math stackexchange that gives more details on this curious feature.

Let's exploit it to get a better solution:
public int lastDigit(int n) {
    int[] fibLast = new int[60]; // 1
    fibLast[0] = 0;
    fibLast[1] = 1;
    for (int i = 2; i < 60; ++i) { // 2
        fibLast[i] = (fibLast[i - 1] + fibLast[i - 2]) % 10;
    }

    return fibLast[n%60]; // 3
}
1. I am going to do the same job as in the first implementation, however I cache the first sixty values in a raw array.
2. Notice the despicable use of the magic number 60 here and in (1). It should be a well commented constant instead!
3. Thanks to the looping nature of the last cypher in Fibonacci numbers, I just have to apply to modulo operator to extract the correct index in my cached values.

As an obvious performance improvement we should initialize the cache only the first time the method is called. In any case, I think the point is made, so I commit the Fibonacci Java class and its JUnit tester to github.

Go to the full post

Add testing to a Maven project

This post was not so obsolete as the previous two ones, however it referred to JUnit 4, while the most interesting point in the argument, I feel, is in the fact that we should use a recent Surefire Maven plugin if we want the test run on build work with JUnit 5.

So, again, so long my outdated post. If interested, you could get its new version on my other blog: https://thisthread.blogspot.com/2020/05/test-on-build-with-maven.html.

Go to the full post

Adding Logback to a Maven Project

If you have written a Java project, maybe using Eclipse as IDE, but fundamentally using Maven as build manager, and you ask yourself how to add dependencies to it and, even more importantly, how to tell Maven to include your dependencies in the resulting jar, making it "fat" but also so more easily usable. This post was for you.

I used Logback as sample library, but the story is the same any dependency you are putting in your app.

Unfortunately it aged badly, so I had to ditch it.

Still, I decided to rewrite it and I put the new version in my other blog. Follow the link if interested in it. https://thisthread.blogspot.com/2020/05/jar-with-dependencies-through-maven.html

Go to the full post

Simple Maven Eclipse Project

As the title hints, this post was about creating a tiny little Java desktop apps on the Eclipse IDE using Maven as building tool.

I say "was" because, unfortunately, it was too obsolete to survive.

My first idea was just to clean it a bit and make it more fit for the current time. Then I found out that it was simpler for me, and clearer for the reader, if I rewrote it from scratch. Along the way, I have also refactored the code and rearrange the repository on GitHub.

Moreover, I moved it to my other blog, this thread, that I plan to keep as the only one active. If interested, please follow the link https://thisthread.blogspot.com/2020/05/simple-maven-eclipse-project.html

Go to the full post

AOP with Spring

Our Spring Boot Web Application is starting making sense. As we have seen in the previous post, the controller is wired to a bean, a Knight, that is wired to another bean, a Quest. When the URI /quest is accessed, the RESTful service's nature of the controller enters in the game and, following all the wiring down to the bottom, what the caller gets is the message generated by the embark() method of the actual Quest objected involved.

Now we want to introduce a class that follows a different perspective, a Minstrel whose raison d'être is singing when a Knight starts and ends a Quest. It's behavior is orthogonal to "normal" way we look at our code. We think at what a minstrel is interested in, we let it know to Spring, and just rely on it. In Aspect Oriented Programming (AOP) terms, Mistrel becomes an aspect of our application.

The nice point in AOP is that only the aspect, here Minstrel, has to know about what is going on. Knight could stay in its blissful ignorance on the matter, performing its mission as nothing as changed. Here I have changed the concrete Knight implementation just to add a line of log in its doQuest() method, that would help us in seeing the system at work. I have written more on Spring log in another post.

To use AOP in Spring Boot, you have to add a dependency in your application POM file. STS helps you not to forget it, anyway, groupId is org.springframework.boot and artifactId spring-boot-starter-aop. Besides, I should give to Spring some way to know which aspects it has to work with. We can do it through a XML file or a Java class configuration AspectJ style. I prefer the second way.

So I created a SpringInActionConfig class where I specified the bean that is actually an aspect:
@Configuration
@EnableAspectJAutoProxy
public class SpringInActionConfig {
    @Bean
    public Minstrel minstrel() {
        return new Minstrel();
    }
}
Notice the two annotations on the class and the bean annotation on its method that just creates a new Minstrel and returns it.

I have implemented Minstrel in this way, again using the Spring AspectJ support:
@Aspect
public class Minstrel {
    private final Log log = LogFactory.getLog(Minstrel.class);

    @Before("execution(public String Knight.doQuest())")
    public void singBeforeQuest() {
        log.info("Fa la la, the knight is so brave!");
    }

    @After("execution(public String Knight.doQuest())")
    public void singAfterQuest() {
        log.info("Tee hee hee, the brave knight did embark on a quest!");
    }
}
The class is annotated as Aspect, and it has two annotated method, one that has to be executed before the Knight doQuest() method, the other after.
Notice the AspectJ sintax. It looked a bit weird to me the first time, however it makes sense. I have used a very plain and comprehensible notation, it could get much more cryptic. On the other side, it is quite powerful.

Now, when we run our application we should not see any change in its behavior, but in its log, that now should have in it something like that:

I have written this post while reading the first chapter of Spring in Action, Fourth Edition by Craig Walls. I have ported the original code to a Maven Spring Boot Web project on the STS IDE, using AspectJ annotations instead of the classic xml configuration.

Full code on github.

Go to the full post

Wiring components in Spring

After mock testing the components structure of my Spring Web application, I am ready to create a real Knight - Quest couple and see how to wire them together.

Firstly, I create a concrete Quest, SlayDragonQuest, and I let Spring know, through annotations, that it is a component and it is qualified as quest.
@Component
@Qualifier("quest")
public class SlayDragonQuest implements Quest {
    public String embark() {
        return "Embarking on quest to slay the dragon!";
    }
}
Then I modify my BraveKnight to let Spring know that it is a component too, named knight, and that it is autowired to the component that is qualified as quest.
@Component("knight")
public class BraveKnight implements Knight {
    // ...
    @Autowired
    public BraveKnight(@Qualifier("quest") Quest quest) {
        this.quest = quest;
    }
 // ...
}
Let's have a look to the KnightController.
@RestController // 1
public class KnightController {
    @Resource
    private Knight knight; // 2

    @RequestMapping("/quest")
    public String quest() { // 3
        return knight.doQuest();
    }
}
1. It is annotated as a RestController, so Spring would use it as a RESTful service.
2. Its knight field is annotated as resource, so Spring would try to inject in it a component named as its type (but starting with a lowercase letter), meaning, the BraveKnight.
3. Any request to the /quest URI is mapped to this method.

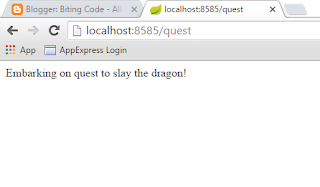
I only have to run it:

If something is not clear on this last step, you may get some hints from the previous Hello Spring Boot post.

I have written this code while reading the first chapter of Spring in Action, Fourth Edition by Craig Walls. It diverges a bit from the original version, since I have developed a Maven Spring Boot Web project, and here I have used annotations instead of the classic xml configuration to signal beans to Spring and wire them together.

Full code on github.

Go to the full post

Mock test on a Spring resource

Following the first chapter of Spring in Action, Fourth Edition by Craig Walls, I'm about to use the constructor injection (a Dependency Injection technique) to implement a IoC (Inversion of Control) relation between a Knight and its own Quest. No disrespect is meant, however I slightly change the original code to adapt it to a standard Boot Maven STS Spring Starter Project with Web dependency.

I put my SpringBootApplication in the dd.sia.knights package, and I created a couple of sub-packages, controller and logic. In the first one I have put a RestController, named KnightController, that owns a Resource Knight and performs a RequestMapping between the URI /quest and the method quest():
@RestController
public class KnightController {
    @Resource
    private Knight knight;

    @RequestMapping("/quest")
    public String quest() {
        return knight.doQuest();
    }
}
I put all the classes rooted in the Knight and Quest interfaces in the logic sub-package. They both have a single method, doQuest() and embark(), returning a String.

Constructor Injection

I created a concrete BraveKnight that implements Knight and has as private field a Quest. Which Quest a particular BraveKnight has is decided at runtime, injecting the actual Quest through the constructor:
public class BraveKnight implements Knight {
  private Quest quest;

  public BraveKnight(Quest quest) {
    this.quest = quest;
  }

  public String doQuest() {
    return quest.embark();
  }
}

Mock Test with Mockito

Now we'd like to check if the class structure we designed works as expected. We can't perform normal unit test with JUnit for the reason that we don't currently have any concrete Quest to inject in our Knight. However we can mock-test it.

To do that we have to add a mokito dependency in our project POM, pom.xml, adding mokito-core from org.mockito for test scope. Then I added a JUnit-Mockito test case for BraveKnight with a single test function:
@Test
public void testDoQuest() {
    Quest quest = Mockito.mock(Quest.class); // 1
    BraveKnight knight = new BraveKnight(quest); // 2
    knight.doQuest(); // 3
    Mockito.verify(quest, Mockito.times(1)).embark(); // 4
}
1. A mock Quest is created.
2. Injecting the mock quest in a BraveKnight.
3. Call the knight method.
4. Ensure that the embark() method of my mock quest has been called once in this context.

Full source code is on github in the springInAction folder.

Go to the full post

Plain MVC Spring project

Nowadays, if you create a new Spring project on STS, the most natural option is using the Spring Starter Project wizard that is going to push you to use Spring Boost. Say that for some reason you don't want to do that, you could fallback to the pre-boot era, here is how, in a few steps.

Basically, you just have to call the Spring Legacy Project, from menu File - New. There you just have to choose a project name and select which template you want to use. Usually Spring MVC Project is a good choice.

Next step would be specify the top level package for you application. And then the wizard would do all the job for you.

Just one thing more, when you get back the control, you'd better update the project through Maven, by right click on the project - Maven - Update Project. After that you should be ready to run the project on server.

Go to the full post

A simple IoC + DI Spring example

In the previous posts I have written a puny Spring Boot application example sporting a trivial RESTful controller Let's spice it up a bit, extracting the business logic from the controller and putting it in a hierarchy of classes. The interesting part of it is that I am going to do it using IoC (Inversion of Control) and DI (Dependency Injection).

I created a sub-package named control, and in it I put an interface, Greeter, that exposes the only method I really care of:
public interface Greeter {
    String greeting();
}
Then I refactored my GreetingController to use that interface to do the dirty job. Something like this:
public class GreetingController {
    private Greeter greeter;

    public String greeting() {
        return greeter.greeting();
    }
}
The reason for doing this should be clear. My controller won't care about the details of how a greeting is generated. It just knows that exists a hierarchy of classes rooted in the Greeter interface, and it would call its greeting() method when it intercepts a user call for this job.

Then I created a couple of concrete classes implementing Greeter. A mock one, thought to be used just in development, and the actual stuff designed to be used in production.
public class MockGreeter implements Greeter {
    private static final Log log = LogFactory.getLog(MockGreeter.class);

    @Override
    public String greeting() {
        log.debug("Generating mock greeting");
        return "mock hello!";
    }
}

public class PlainGreeter implements Greeter {
    private static final Log log = LogFactory.getLog(PlainGreeter.class);

    @Override
    public String greeting() {
        log.trace("Generating plain greeting");
        return "Hello!";
    }
}
I know, it is not easy to spot a difference between them. Let's assume they will grow and diverge to something more useful in the future.

The interesting stuff here is defining how the controller should know which Greeter to use. In the old pre-IoC days it would be its job to create a dependency with the selected Greeter, creating an object of a concrete type. Nowadays we prefer to do the other way round, we invert the control, and let the concrete Greeter signal its availability to be used by the controller to the framework (in this case Spring). We can do that in a few different ways, being annotation usually considered the preferred one.

The controller should tell to Spring in some way that a field it owns should be injected with a dependency (here is where DI enters in the game). There are a few ways to do it. I usually prefer to annotate the data member, like this:
@RestController
public class GreetingController {
    @Resource
    private Greeter greeter;

    // ...
}
On the other side, each Greeter implementation that could be selected from Spring for the controller should show it up:
@Component
public class MockGreeter implements Greeter {
    // ...
}
We still have a problem. We have two different implementations of Greeter competing to be injected to the controller. Which one should Spring choose?

One way of solving it is by configuration. We specify the spring.profiles.active property in the Spring application.properties file giving to it a value that would act as a selector for the appropriate Greeter. In my case, I want to play with two different configurations, dev and prod. When in development (dev) I want the mock greeter to be injected in the controller, while in production (prod) the plain greeter should be used.

In case of production my Spring configuration file would have this line in it:
spring.profiles.active=prod
My Greeter classes would be annotated in this way:
@Component
@Profile("prod")
public class PlainGreeter implements Greeter {
// ...
}

@Component
@Profile("!prod")
public class MockGreeter implements Greeter {
// ...
}

The complete Spring Boot project is on github. The relevant files are

Go to the full post

Spring log only to file

Logging is one of the most fuzzy area in Java. The standard JUL, java.util.logging, entered the arena late, and it has to compete against well respected libraries like Log4J2, SLF4J and Logback (usually SLF4J with Logback). The Spring guys decided to go for JCL, the Apache Commons Logging, that wraps SLF4J for the actual logging library of your choice, here being Logback.

If you don't have any special requirement, you can happily ignore which actual logger is used, just write your code for the JCL interface, leaving out of your scope any low level dependency.

However, if you want your log going to a file, and not to console, as often is the case, you have to deal with the actual logger. Not a big deal, if Logback is your choice.

Let's modify the function greeting in my GreetingController to log some (un)useful comments:
public String greeting() {
 log.trace("trace hello");
 log.debug("debug hello");
 log.info("info hello");
 log.warn("warn hello");
 log.error("error hello");
 log.fatal("fatal hello");
 return "Hello!";
}
Where log is private static final object of type org.apache.commons.logging.Log initialized through the JCL LogFactory.

This could be enough. Still you should have a mildly surprising output, something like:
2016-05-30 22:14:00.888  INFO (...)  : info hello
2016-05-30 22:14:00.888  WARN (...)  : warn hello
2016-05-30 22:14:00.888 ERROR (...)  : error hello
2016-05-30 22:14:00.888 ERROR (...)  : fatal hello
I edited out details in the middle of the lines, I want to focus on the fact that we miss trace and debug messages, and the fatal one became an error one. If you really want fatal log messages, logback is not your choice, since it does not have this log level, and so they are mapped as simple errors.

The first problem could be easily solved adding an entry in the Spring application.properties file (in source/main/resources). Say that I want to log all messages, from trace up to fatal, generated in my packages rooted in dd.manny. I'll add this line:
logging.level.dd.manny=trace
Good. Now I want Spring to log to a file. By default the file will have name spring.log, and I can decided in which folder to be placed like this:
logging.path=/tmp
Nice and easy. Just one thing. I wanted the log to go exclusively to file. To get this effect I have to configure the actual logger.

For this reason I added a logback configuration file in the src/main/resources folder that is mimic of the default Spring one, but it has no appender for console. The key point is that I keep the log level to INFO and I specify FILE as appender, that is going to be set through the property specified above.

The full Spring Boot project is on github. The relevant files are GreetingController.java, application.properties, and logback.xml.

Go to the full post

A simple RESTful Web Service

In the previous post, I have created a very simple WebApp using Spring Boot. Even if it works fine, it isn't much of a fun, giving no feedback whasoever to the user. Let's add a first basic web service to it.

In the Spring jargon, we want a REST Controller, so I create a new subpackage named controller below the one containing the application class, and in there I put a class, GreetingController, that is going to perform the mapping between the URI and the service, and return the expected resource.

The beauty of the Spring implementation is that I create a plain class, called a Bean, not to be confused with Java Bean nor Enterprise Java Bean, and I just annotate the class as @RestController and the method as @RequestMapping:
@RestController
public class GreetingController {
    @RequestMapping("/greeting")
    public String greeting() {
        return "Hello!";
    }
}
That's it. Springs takes care of all the boring details, and lets Tomcat answer generating a document that contains only "Hello" to a request address to the greeting address.

To test if this is working as expected, we can now start the project from the Boot Dashboard, and then accessing the resource from the internal browser, or from an external one. In any case the result should be something like this:
If you wonder why and how I'm using a non-standard Tomcat port, please refer to the previous post.

Sure you can run the application outside STS. Calling maven on the package target would let it generate a jar named something like hello-0.0.1-SNAPSHOT.jar in the target folder, than you can run it with the java -jar command.

Source code is on github. The only relevant change from the previous version is the GreetingController.

Go to the full post

Hello Spring Boot

Creating a web app with the Spring Framework using Boot is quite easy, assuming you have already installed Spring Tool Suite, the Pivotal IDE based on Eclipse.

Actually, it is just a matter of selecting on the menu File, the item New, and there Spring Starter Project. There you are presented with a bunch of names to give and selection to make, I'd suggest you to check start.spring.io for inspiration, since this STS wizard it is nothing more than a proxy to that web page, that would guide you to the creation of a Spring application.

I named my project helloSpring, and then I kept all the main default settings, like the Maven support, jar generation, Java 1.8 language usage, and I only added one single item in Dependencies: Web.

What it is going to happen is that my Spring project would generate a single huge jar embedding Tomcat and all the required dependencies to let the application work. After confirming, Maven could take some time to get all the required jars. However in the end I'll have a nice project ready to be compiled. Even if it is not to do anything sensible at all.

I'd suggest you to have a look at the generated pom.xml file. You won't be surprise to find out that it shows the information you entered in the wizard.

Then, accessing the Project Explorer, you'll see in the Spring Elements a bean HelloSpringApplication (the prefix is the project name, if you chose a different name for it, you'll see the change reflected here).

Let's have a better look a this bean. I asked to the wizard to put the generated classes in the dd.manny.hello package, so there I'm going to find it.

There is not much to see, apart from that the class has been decorated with the @SpringBootApplication annotation, it contains a main() method that calls SpringApplication.run() passing the class itself. Even without knowing anything about Spring Boot, looks intuitive what is going on here. On startup Spring would see that this is the booting class, and would use its main to call the SpringApplication run() method.

Now I'd like to run this application, even I can't expect to get much feedback from it. The easiest way to do it, it is from the Spring Boot Dashboard. You should see that view in the bottom left of your STS window. If for any reason it is missing, you can get it back from Window - Show View - Spring - Boot Dashboard.

In the Boot Dashboard you should see a collapsed list named local. Open it and you should find your project. My one is there, named helloSpring. Now I can use the menu on the Boot Dashboard view, or right-click menu if I am in the mood for it, to start or restart it.

What I usually I get it now is a fat exception. This is because I have something else running on the 8080 port on my machine and STS is trying to run the embedded Tomcat for my application right on that port. If you get
java.net.BindException: Address already in use
You are having the same problem.

Not a big issue, tough. There is a file in the source/main/resources/ folder named application.properties that, not surprisingly, let us to set properties used by our application. Initially it is empty, I added this line:
server.port = 8585
Meaning that I want my Tomcat to use a different port from the standard one.

Now I can restart my application, and get a smooth startup, as showed by the error-free log in the Console view.

The full code for the project is on github.

Go to the full post

JSP servlet init parameters

Creating init parameters for a servlet is easy, when we need to do that for a JSP page it is only a bit more trickier, and we should remember a couple of details.

We can't use annotations, since the translation from JSP to servlet is not in our control. So we have to fall back to the Deployment Descriptor (DD). So, let's go in our web app WEB-INF directory and modify (maybe create) the web.xml file.

In the web-app element we need to create two elements, a servlet and a servlet-mapping, and in the servlet one we could create any init-param we need, just like we can do for a plain servlet.

Here is an example for a servlet element, based on a JSP page named counting.jsp placed in the web app root directory:
<servlet>
  <servlet-name>Counting</servlet-name>
  <jsp-file>/counting.jsp</jsp-file>
  <init-param>
      <param-name>base</param-name>
      <param-value>42</param-value>
  </init-param>
</servlet>
Notice the jsp-file element, that replaces what in a plain servlet is a servlet-class.

Then we need a servlet-mapping element, that should look something like this one:
<servlet-mapping>
  <servlet-name>Counting</servlet-name>
  <url-pattern>/counting.jsp</url-pattern>
</servlet-mapping>

And that's it. Now we can access that init parameter from our Counting JSP page.

For instance, we could be interested in accessing it when the JSP is initialized. In this case, we would override the jspInit() method and get it through getServletConfig(). Like this:
<%!
public void jspInit() {
    log("Config init param: " + getServletConfig().getInitParameter("base"));
}
%>
If we want to access it from a scriplet, we use the config implicit object:
<%= config.getInitParameter("base") %>

Go to the full post